A pre-visit site analysis is the desk research you do on a property before you drive out. It covers the parcel's size and existing conditions, its zoning and setbacks, its physical constraints, and any natural hazards that need a closer look. Most of it can be pulled from the address or Assessor's Parcel Number (APN) using public records, aerial imagery and hazard maps. Done first, it turns the first site visit from discovery into verification.
Key takeaways
- Five things can be checked from the desk: parcel basics, existing conditions, zoning and setbacks, physical constraints, and natural hazards.
- Desk research narrows the questions. It doesn't replace the site visit, a boundary survey, or a soils report.
- Hazard maps give you referrals to verify, not final determinations.
Why do the site analysis before the site visit?
Fall is when leads for spring builds stack up, and the daylight for site walks gets shorter every week. The first visit to a new lead is usually unbilled. If half of it goes to pacing off the lot, spotting the slope and wondering about the flood zone, you've spent a morning learning what the records already knew.
A short desk review changes what the visit is for. You arrive knowing the lot's size, what's on it, what the zoning allows and which hazards to look at. The visit becomes a check of specific questions, and the first client conversation starts at "here's what your site allows," not "let me get back to you."
The pre-visit site analysis checklist
1. Parcel basics
Start with the APN and the county assessor record: parcel area, lot dimensions, year built and recorded building square footage. Pull the parcel lines from the county GIS map. Treat them as approximate. GIS parcel lines are good for planning, but they aren't a boundary survey.
2. Existing conditions
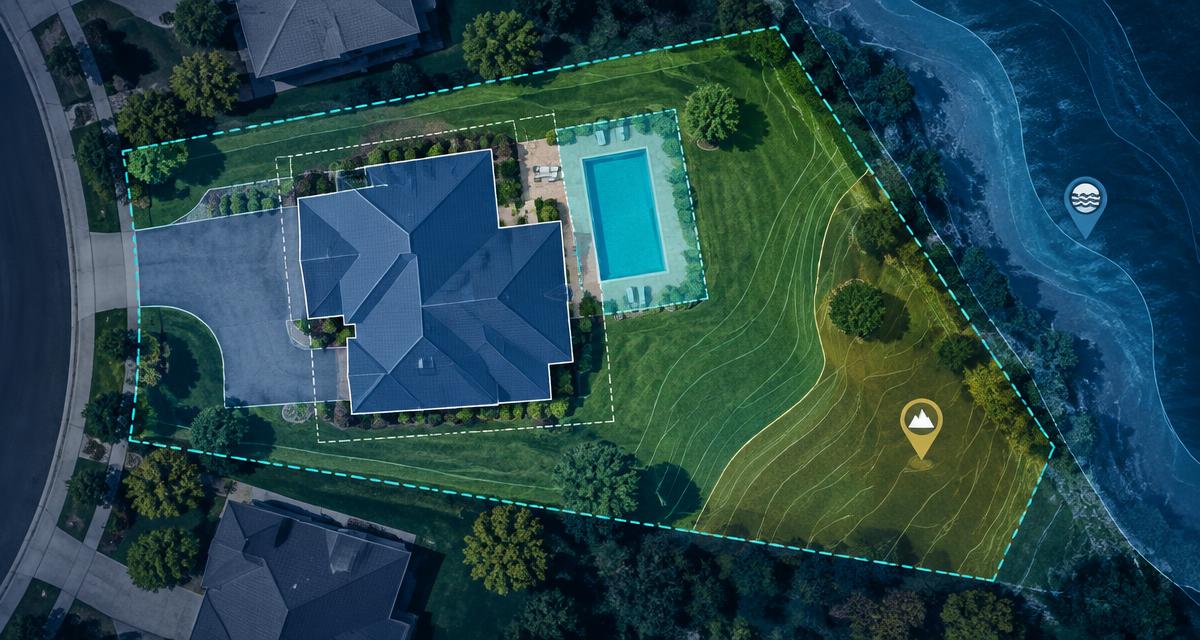
Map what's already on the lot: the house, garage, accessory structures, pool, driveway and other hardscape, lawn and planting areas, and trees. Measured areas matter here. Roof area, hardscape and lawn all feed lot coverage, drainage and landscape scope.
Then compare current aerials with older ones. Additions, removed trees, new sheds and filled-in pools show up quickly across a decade of imagery, and each one is a question for the owner: was it permitted?
3. Zoning and setbacks
Find the zoning district, then the front, side and rear setbacks, height limit and lot coverage cap. Check for overlays, such as historic districts, coastal zones and hillside or tree ordinances, that add rules on top of base zoning. Our guide to checking building codes for your address walks through the manual steps, and Codes.IQ returns the rules for a parcel with the code section cited for each one.
4. Physical constraints and opportunities
Look for what will shape the design and the budget:
- Slope and drainage: which way the lot falls, and whether water heads toward the house.
- Trees: large or protected trees that limit where you can build or trench.
- Access: driveway width, street frontage and how equipment gets in.
- Orientation: sun exposure, views and neighbor sightlines.
Note the opportunities too: flat areas that suit an addition or ADU, mature trees worth keeping for shade, and existing access you can reuse.
5. Natural hazards
Check the property against the main hazard maps:
- Flood: FEMA's Flood Map Service Center (msc.fema.gov) shows the flood zone on the current Flood Insurance Rate Map.
- Wildfire: state wildfire hazard maps. In California, that's CAL FIRE's Fire Hazard Severity Zone maps.
- Geologic: state geological survey maps for fault, landslide and liquefaction zones where they exist.
Treat every hit as a referral: a reason to look closer, call the local floodplain administrator or bring in a geotechnical engineer. It isn't a final answer.
The checklist at a glance
| What to check | Where to find it from the desk | What the site visit confirms |
|---|---|---|
| Parcel area and lot lines | Assessor record, county GIS | Fences, monuments and anything that looks off |
| Existing structures and hardscape | Current and historical aerials | Condition, unpermitted work, recent changes |
| Zoning, setbacks, height, coverage | Zoning map and municipal code | How the rules land on the real lot |
| Slope, trees, access | Aerials, elevation data | Drainage behavior, tree health, equipment access |
| Flood, fire and geologic hazards | FEMA, state hazard maps | What a specialist needs to review |
What a desk review can't tell you
Desk research narrows the questions. These still need eyes on the ground or a specialist:
- Boundary location. Only a licensed survey establishes it. See site plan vs. property survey for when you need one.
- Easements. Many don't show on GIS. A title report is the reliable source.
- Soils. Bearing capacity and expansive soils call for a geotechnical report.
- Utilities. Locations need field verification, and an 811 call before any digging.
- The client. How they use the yard, what bothers them and what they'll pay for.
IQ Agents handle the research. You handle the project.
Sign up for freeA sloped-lot remodel, pre-briefed
Here's how the desk-first approach plays out (illustrative example):
- The call. A builder gets a lead for a remodel and a new patio on a sloped lot.
- The brief. Before scheduling the walk, he runs the APN through Instant Site Intelligence and gets the measured conditions, setback lines, constraints and hazard referrals.
- The visit. He arrives with three specific questions about the slope and drainage instead of a tape measure and a blank notepad.
- The result. The first meeting covers what the site allows and where the budget risk is, and the next step is a scope, not a second visit.
How to run the analysis in minutes with Instant Site Intelligence
Instant Site Intelligence is one of InQI's Impresarios, structured AI workflows that run inside the InQuest workspace. It starts from your Generative Site Plan, the scaled, auto-traced plan InQI builds from an address or APN. You choose the scope, the whole property or a specific area, and it returns a structured site brief:
- Measured conditions: parcel area, roofs, hardscape, lawn, pool and trees, measured from the active site plan. No geometry is invented.
- Setback study: setback lines mapped on the parcel.
- Constraints and opportunities: what limits the site and what it offers.
- Aerial history: current imagery compared with aerials from about 12 years earlier.
- Sourced hazard referrals: what to verify, and where each flag comes from.
You review every output, and data depth varies by county. Pair it with Codes.IQ when the project turns on zoning rules. To see a real example, the Site Baseline sample on the Impresarios page shows the output for an actual property.
Frequently asked questions
Walk in with questions, not a tape measure
Enter an address or APN, and get a structured brief of the site before you drive out.